Dynamic RLS via Hierarchy in Power BI
I recently was working with a client and we were trying to implement row level security for a sales territory hierarchy. I am posting this blog because it wasn’t quite as intuitive as I would have thought.

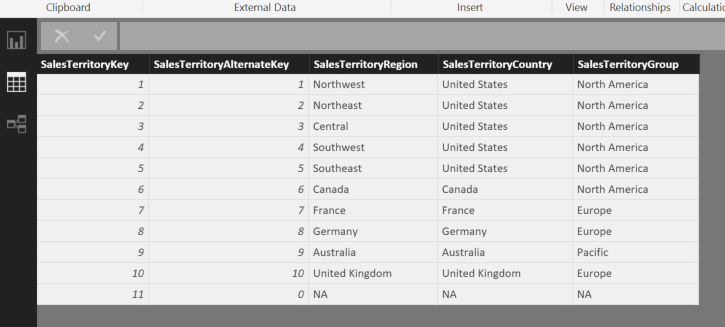
For this blog post, I will work with the very simple AdventureWorksDW2012 (download here) DimSalesTerritory table. This sales territory dimension only has 11 rows but imagine if the hierarchy breakdown had 10k or more. I will explain a couple of iterations I took on the problem.
This blog post will be more “terse” than usual. So some of you may be very happy to not have to endure my hyperbole on the topic at hand 🙂
One mention I will make is that if you are trying to implement Dynamic Security, the “Securing the Tabular BI Semantic Model” white paper provides an in-depth look at the patterns being shown below.
GitHub Repo
If you want the two PBIX files I use below to more easily follow this solution, please find them on my GitHub repo
https://github.com/realAngryAnalytics/angryanalyticsblog/tree/master/DynamicRLSwithHierarchy
Simple RLS Example
So, the issue we were trying to solve was the fact that we had a table that showed the employee relationship to their respective Sales Territory. This is a quite simple problem to solve if there is a 1 to 1 relationship between employee and Sales Territory. If an employee can only access Sales Territories they are associated with, then the “security” table would look like this:

For this table I simply used a calculated table derived from the AdventureWorksDW DimEmployee table. I purposely excluded all the records that had a Sales Territory of N/A. See the DAX for this table below.
Security Table = SUMMARIZECOLUMNS('DimEmployee'[SalesTerritoryKey],
                 DimEmployee[EmployeeKey], DimEmployee[EmailAddress],
                 FILTER(DimEmployee,DimEmployee[SalesTerritoryKey]<>11))
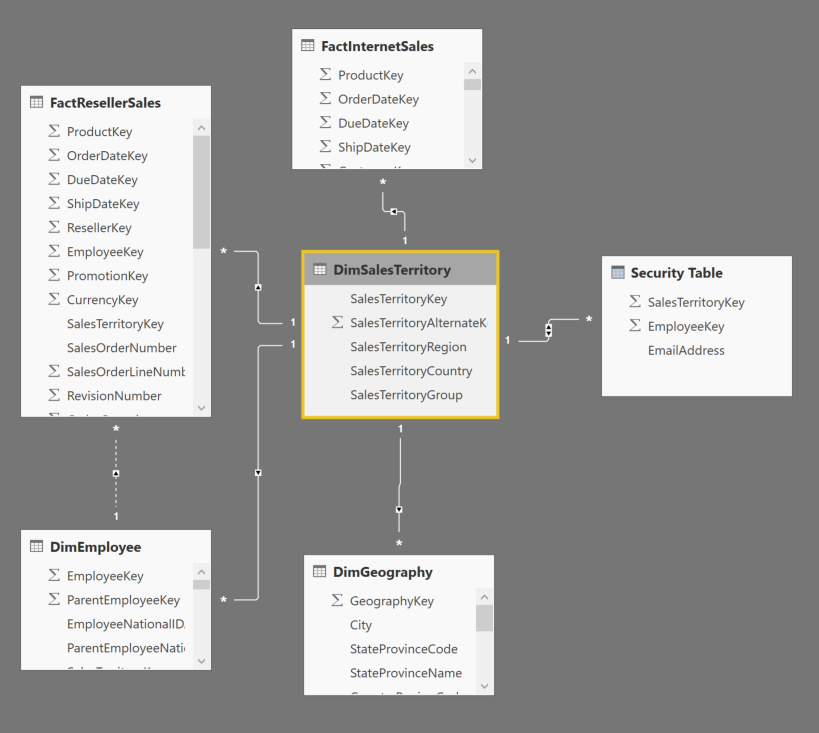
A quick look at the data model
Now, simply go to your “Manage Roles” option on the modeling tab of Power BI Desktop:

…and for the DimSalesTerritory table enter the following DAX in the Table Filter DAX Expression
DimSalesTerritory[SalesTerritoryKey] = CALCULATE(
          VALUES('Security Table'[SalesTerritoryKey]),
          SUMMARIZE(
            'Security Table',
            'Security Table'[EmployeeKey]
          ),'Security Table'[EmailAddress]=USERPRINCIPALNAME()
         )
Name the above role as “Basic Security”.
The above pattern is easy to pick out in the white paper mentioned above. The USERPRINCIPALNAME() expression ensures that DAX picks up the email address of the individual logged into powerbi.com
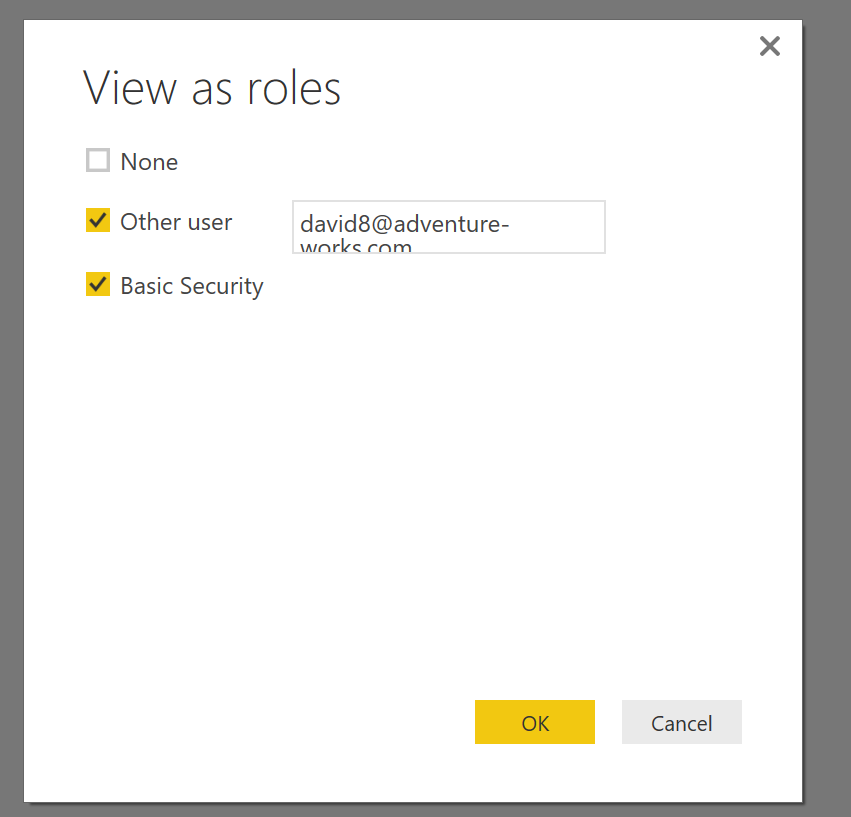
When we select “View as Role”, check the “Other user” box to use a user other than who is logged into the machine (because your email address is likely not in the adventure works DW sample database). Enter “david8@adventure-works.com”
When back on DimSalesTerritory in the table view, we can now see that the only territory allowed in this view is the Northwest United States

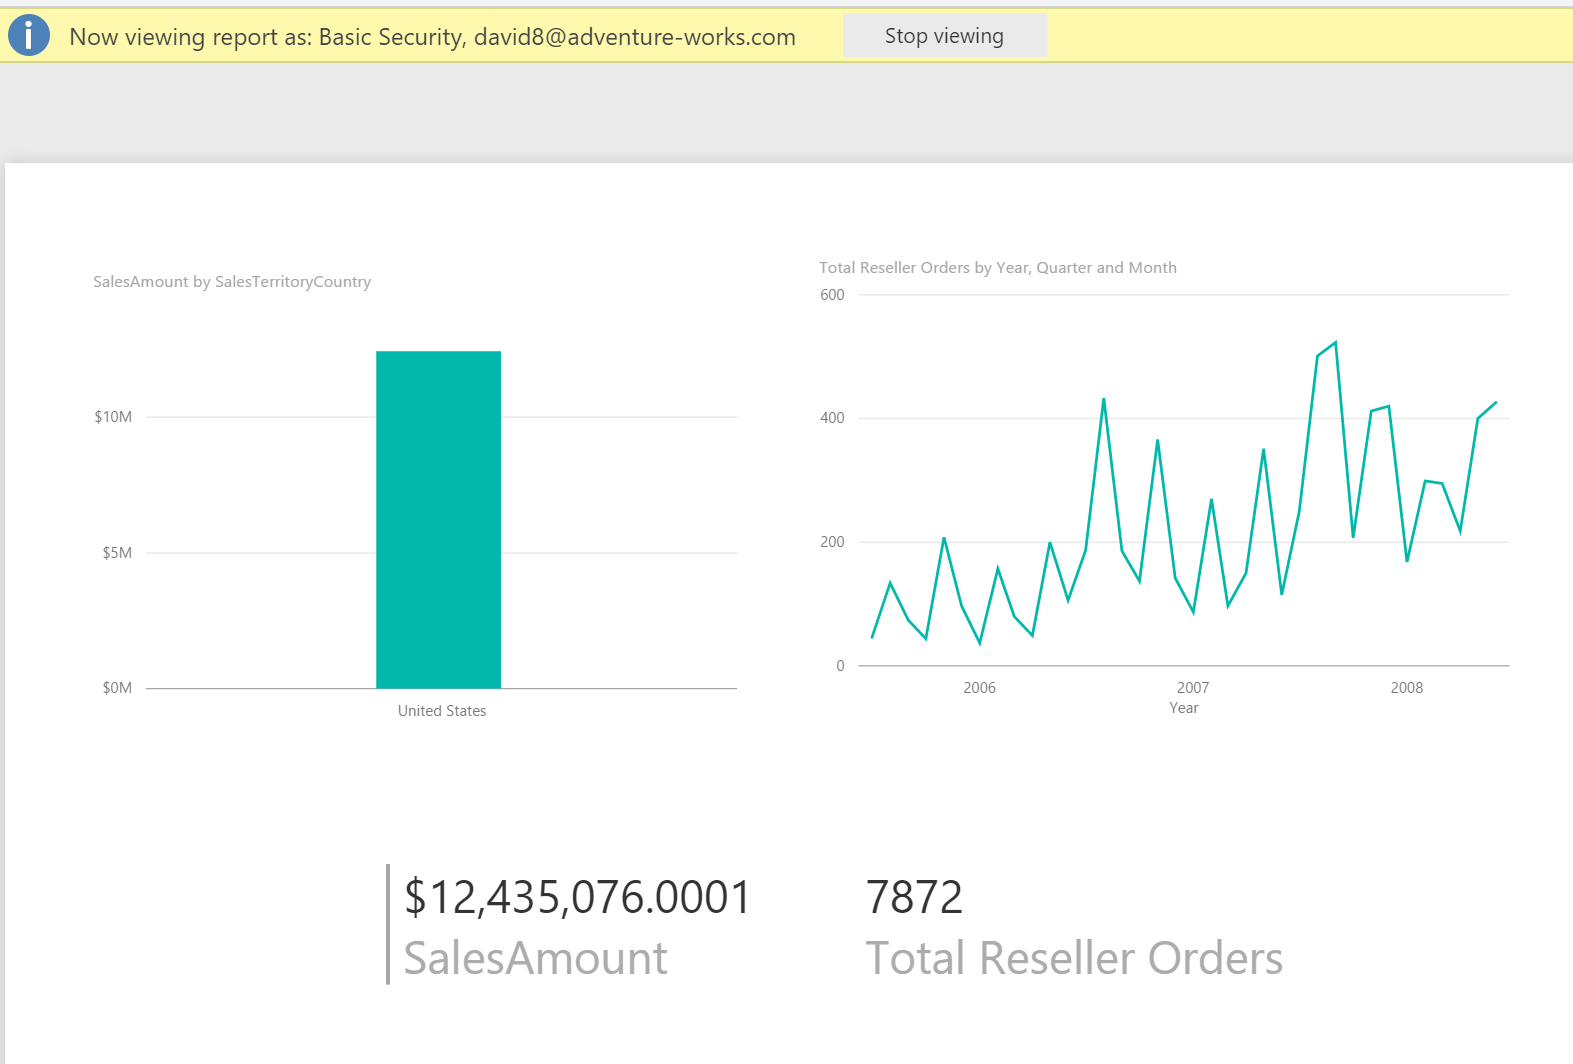
We can also review some simple visuals including a geography hierarchy bar chart, total orders over time line chart and a card. (This is all using the FactResellerSales data)
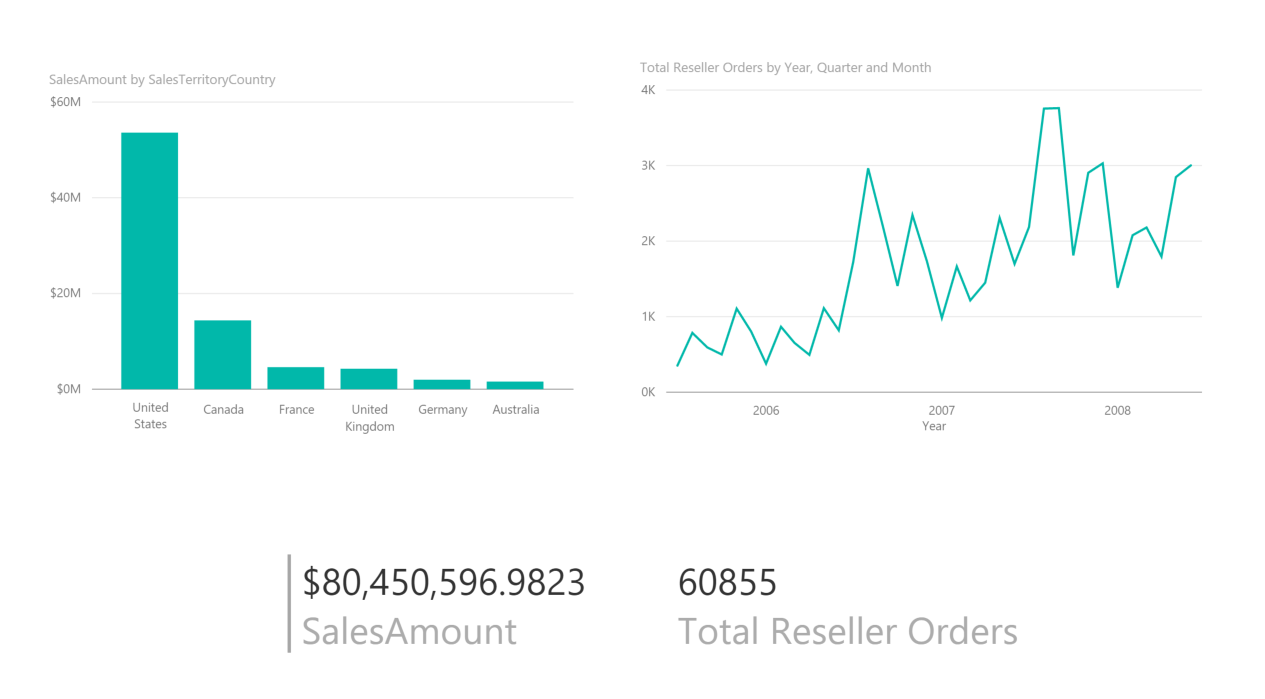
When we remove the Role filter, we can see all of the geographies re-appear
Employee Hierarchy RLS example
The above is a pretty straightforward dynamic row level security example.
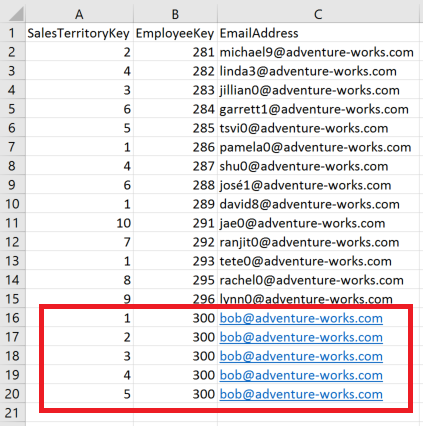
Now let’s assume an example that all the employees in the United States territory have a manager. Let’s call him Bob. Bob should be able to see all the records for the United States. This includes the Northwest (1), Northeast (2), Central (3), Southwest (4), and Southeast (5) territories.
If we do a simple right click “Copy Table” on the Security Table to Excel, we can add the necessary rows for Bob to have the access he needs to see all rows for the United States.
What is the problem with this approach?
For our simple AdventureWorks database, this is fine because of the small number of records. If we consider a real world retail store example, each sales territory may be broken down into 30 districts, and each district may have 20 stores. We may have 20k employees as well. So our Hierarchy would look like this:
Country -> Region -> District -> Store
6 Countries -> 10 Regions -> 300 Districts -> 6000 stores
The CEO of the company would have to have 6000 entries in the security table, a region manager would have to have 600 entries and so on. This table starts to get extremely bloated. In my real life client example we estimated that the security table would have between 10-50 million records in it.
A better approach
Ideally, I want the CEO of the company should only have to have 6 records for the highest level of the hierarchy. In our example above of Bob that should have access to everything in the United States, he would only have to have 1 record for the United States. This greatly collapses our bloated security table and if the company has 20k employees, if you include some multiple entry managers (someone who may manage 2 districts, or someone who manages 2 or 3 stores), you would only have around 25k records.
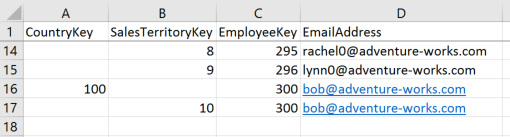
A security table would now look like this:
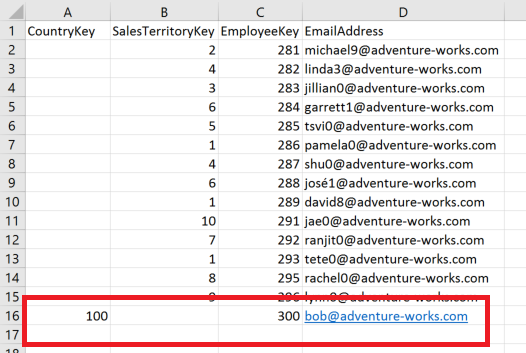
We have added a column for CountryKey (100 represents the United States) and we only have one record for Bob instead of 5.
Applying this Solution

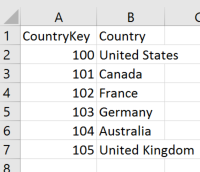
A few things need to be done to our PBIX file to implement this. First, we need an additional dimension table for each additional hierarchy level added to our security table above. I have replaced the Calculated Security Table and a new Country table with an RLS_tables.xslx spreadsheet that I have included in the GitHub resources above. It has a second sheet for “Country”.
Note: We would need a sheet/dimension for District and Store if we were to implement a larger hierarchy as I discussed above
To make this new method work, the FACT table (in this case the FactResellerSales) needs to include a column for each level in the hierarchy that may need to be used to filter. Therefore, CountryKey has to be added to the FactResellerSales table. This is best served from your underlying database, but to keep this entire solution in Power BI Desktop, I have added a cross reference table to the RLS_tables.xslx spreadsheet that links SalesTerritoryKey and CountryKey.

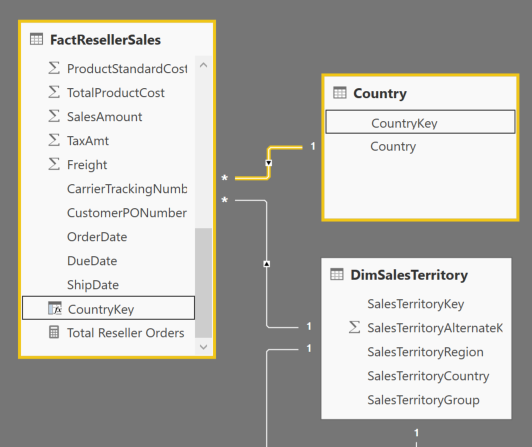
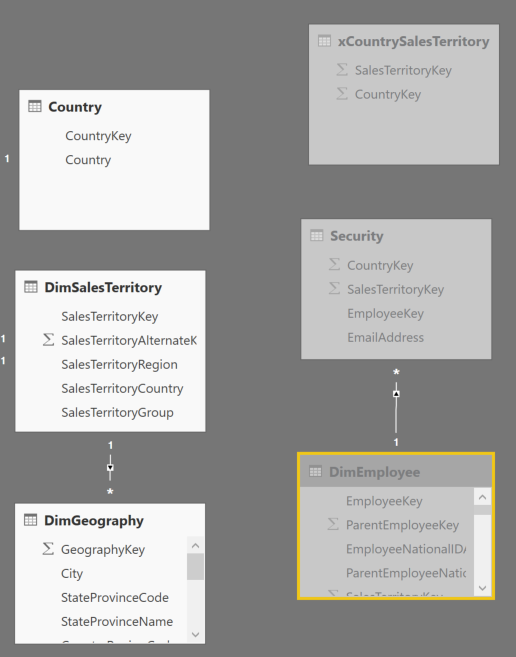
Pay attention to the new data model. Note that the relationship from DimSalesTerritory to the Security table has been removed. This change will be discussed a little later.

To get the CountryKey to exist in the FactResellerSales table, add the following calculated column using LOOKUPVALUE() function
CountryKey = LOOKUPVALUE(xCountrySalesTerritory[CountryKey],xCountrySalesTerritory[SalesTerritoryKey],[SalesTerritoryKey])
With CountryKey in the FACT table, now create single direction relationship from Country table to FactResellerSales via the newly added column. You would repeat this process for additional dimensions such as District and Store in a real world scenario.
Handling the Dynamic RLS
For this most important part, I have to give credit to Kasper De Jonge (@Kjonge) for helping me. Removing the relationship between the Security table and DimSalesTerritory was key. We now have two paths to securing the FACT table and trying to navigate Active/Inactive relationships got too messy and I was unable to resolve.. This is where using LOOKUPVALUE() and MULTIPLE active ROLES at the same time worked.
In Manage Roles, create a new role named “Country Security” and use the following DAX.
Country[CountryKey] = LOOKUPVALUE(
      'Security'[CountryKey],
      'Security'[EmailAddress],USERPRINCIPALNAME(),
      'Security'[CountryKey],Country[CountryKey]
     )
The LOOKUPVALUE() function searches the email addresses in the security table for the currently logged in person and will find what CountryKey that they have access.
Create another Role named Sales Territory Security and use the following DAX.
DimSalesTerritory[SalesTerritoryKey] = LOOKUPVALUE(
           'Security'[SalesTerritoryKey],
           'Security'[EmailAddress],USERPRINCIPALNAME(),
           'Security'[SalesTerritoryKey],DimSalesTerritory[SalesTerritoryKey]
         )
Quite similarly, this is finding the SalesTerritoryKey that the person has access.
Now when we view the report as Bob, we are seeing all of the data for the United States with a single CountryKey in the security table instead of having to have a row for every territory.
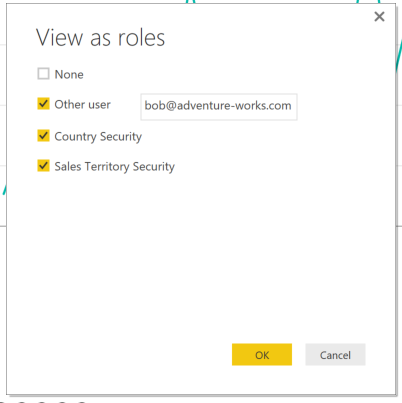
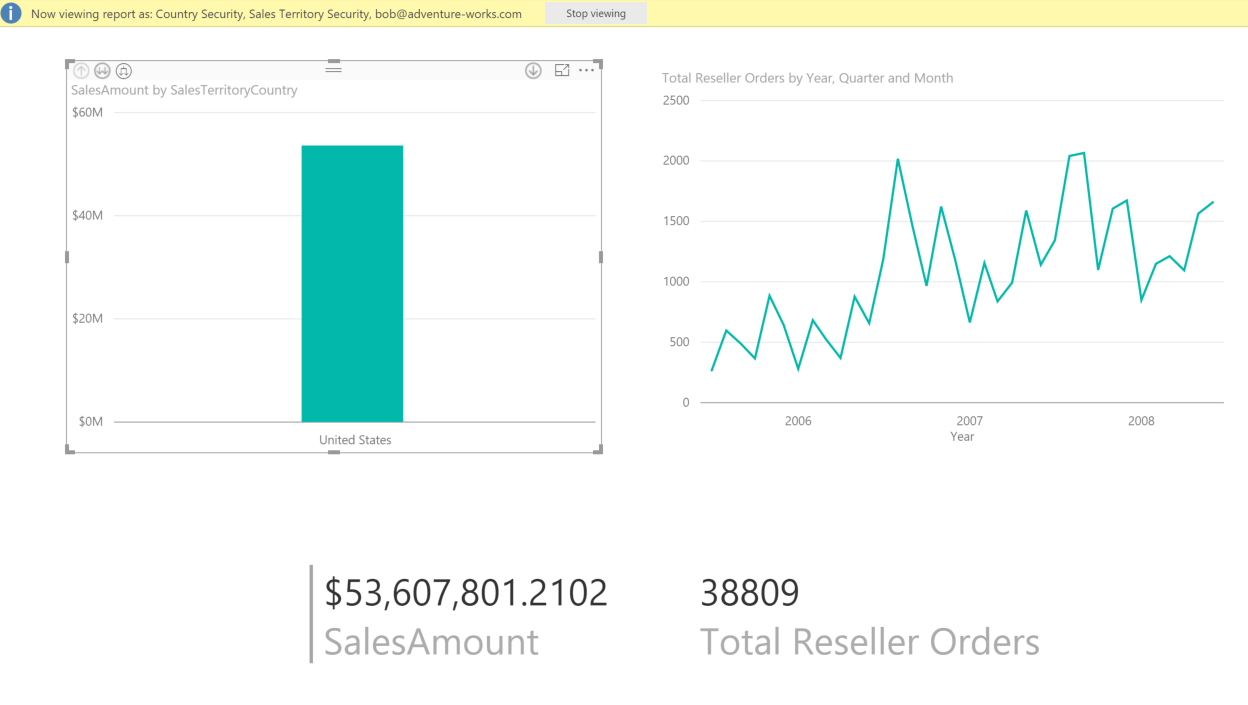
What makes this especially powerful is that having multiple roles (one for Country and one for DimSalesTerritory) creates an “OR” condition between them… I am going to modify the Security table in my excel spreadsheet to include for Bob the ability to see data for the United Kingdom sales territory also.
Now Bob sees his Country information plus an additional sales territory.

Finishing Up
To round this out, we probably want to hide the Security table from being viewed in the report and also add a FALSE() DAX expression on the Security table in the two roles that we created so that if someone were to do an “Analyze in Excel” there would be no exposure to the table.

Conclusion
That is it! we have just solved a hierarchical Security structure being used with Dynamic RLS in Power BI. I didn’t feel that this topic of using a hierarchy in dynamic security was well covered in other posts so I hope that this helps.
On a side note, if anyone has a good tutorial on how to better format wordpress sites (I feel like i am SHOUTING with this font) and restrict the numerous spam i get, please tweet me at @angryanalytics 🙂