Power BI Governance – Approve/Reject all dataset creation in your tenant
This is a post about Power BI Governance that will not use any Power BI capabilities. We are going outside the box here to get the job done on keeping your environment governed.
If you can complete 3 simple steps that I will show below, then you can get an email like the one below every time someone adds an unauthorized dataset into your Power BI environment.

This blog post was inspired by some great work by Kent Weare and our Flow team here: https://flow.microsoft.com/en-us/blog/automate-flow-governance/ It was just close enough to what I needed to do that it worked out. In this post if I skim over a few details, refer back to this post and it might help.
Scenarios
Power BI has introduced more governance controls recently with the GA of Workspaces V2. I encourage everyone to use the out of the box features that now exist especially the contributor role discussed here.
In my scenario, the problem happens to be that V1 workspaces don’t have the same governance capabilities and any Power BI Pro user can go create a Team or O365 group and they will automatically become an administrator of the corresponding Power BI workspace (V1) that gets created. I want to monitor for any datasets getting created in V1 workspaces and be able to delete them even though I am NOT an admin in those workspaces. This is NOT possible to do without intervention I will outline below. Of course, i want to be able to contact these users and coach them about using new V2 workspaces.
Another scenario that can be done with this is to monitor for “rogue” gateway datasets. Would need a few modifications to the below workflow but would also be a popular scenario. I have talked to some organizations that have found dozens of gateways being used that they didn’t know about.
Three simple steps
I am lying as these steps aren’t so simple. They require skills that aren’t necessarily what a BI administrator may have. The good news however is that if you can get a little help from an O365 global administrator and maybe a developer friend, you can knock this out in less than a day. I have done most of the hard work on this and collectively built this solution in probably two developer days.
The three steps described below are as follows
- Need to register an app in Azure Active Directory to be able to use the Office 365 Management API, the Graph API, and the Power BI API. You will need a global administrator grant a set of permissions to this App before steps 2 and 3.
- In Microsoft Flow (or in Azure Logic Apps) import the provided “Flow” that contains all of the logic required for this.
- Use Postman (or REST API tool of choice) to call the O365 Management API to set the Flow created in step 2 as a “webhook” to any O365 audit log events (which of course includes “PowerBI-CreateDataset”.
Once the above is completed you will be amazed at how you now have the control that you didn’t think was possible. You no longer have to constantly audit for bad actors.
Let’s get started!

Azure Active Directory (O365 permissions) Setup
You may need a trained professional for this as I won’t be listing out all the necessary steps here. What makes it even harder is that we recently changed the user interface for this so catching up with some old docs may be confusing.
Go to the Azure Portal and from Azure Active Directory go to “App registrations” and click on “New registration”. Give it a unique name and the redirect url can just be localhost

After it is registered, open it up and record/copy the following properties on the “Overview” dialog:
Application (client) ID
Directory (tenant) ID
You will need both of these GUIDs later.
Go to the “certificates & secrets” dialog and create a “new client secret”. Also record/copy this value. It will be referred to as “App Secret” later in this post and we will need it.
On the “API permissions” dialog you will need to add permissions from 3 services: Office 365 Management API, Graph API, Power BI Service. These should be listed as groupings that you can select specific permissions out of. The screen shot below shows the permissions out of each group you are going to need. Pay attention to the “Type” indicator of Application or Delegated.

Until this point, you might be surprised that you have been able to do all of this without a global administrator. Well, none of this will work if you don’t do a very important task of clicking the “Grant Consent” button at the bottom of this dialog page. This is going to either not exist or be grayed out if you are not an administrator.

Note: Go back to the overview dialog for this app and simply take note of the “Endpoints” button at the top. These are the different API authorization endpoints for the different services. I have provided what you need in the source code for the Flow and Postman, but it is nice to know how to get back to verify these later if something isn’t working for you.
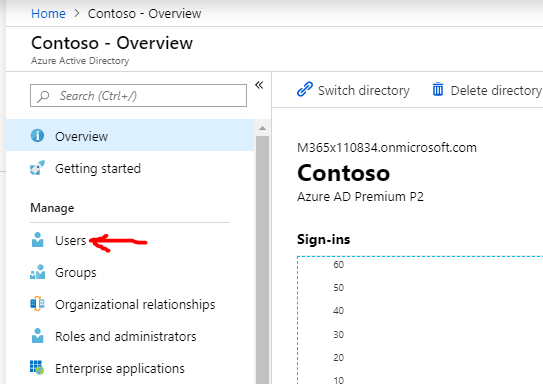
Go back to Azure Active Directory and in the left nav go to “Users”
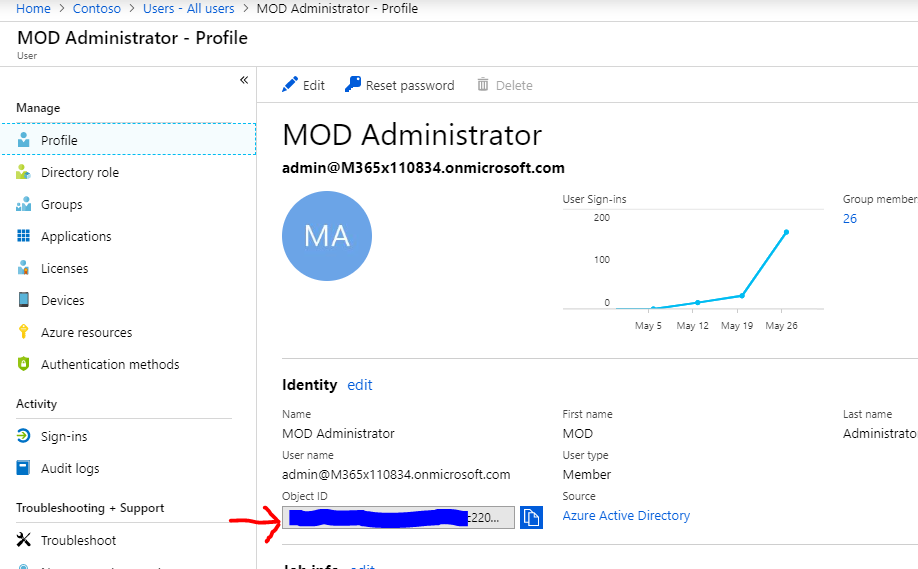
We need to find a Power BI Administrator that we don’t mind recording a password value for to be used in our Flow app. Often this is going to be a service account of some sort that gets used for API purposes ONLY and has different restrictions on password rotation/etc. This should have “Power BI Admin” privledges.
In my example i will be using the same account as a Power BI Admin Service Account and Power BI Admin email notification but you don’t want this in real life. Get the “Object ID” from the Profile dialog and record/copy it for later use.
That’s it. Step #1 complete.

Import package to Microsoft Flow and Configure
In the source code repository on GitHub I have provided both a Zip file and a JSON file that can be used. I haven’t fully tested the JSON file as that is supposed to allow you to import directly to Logic Apps. Microsoft Flow after all is built on top of logic apps so if you prefer that route go for it. For this blog post we are going to use the zip file (aka package).
Two connections that I use in this flow that you should be aware of is “Office 365” and “Flow Approvals”
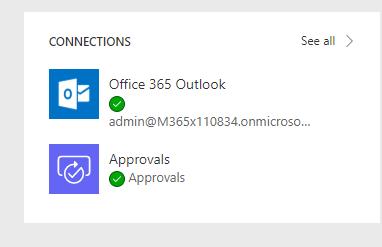
When you import the package, you are going to need to use existing connections for these or create them in the “Data” section.
Note: I have no idea about Flow licensing or if your organization is setup for it. It could be possible that doing Flow Approvals requires a certain SKU or something. Literally no idea. If the below import steps fail simply because of the Approvals connector, let me know via Twitter @angryanalytics and I can create a version without approvals and just notifications.
The import package dialog looks like this. You can use the “Action” button to make some modifications upon import (not sure why anyone wouldn’t like the name “angry governance”)

The related resources “select during import” link is where you can define new connectors if you don’t already have them in the “Data” section of your Flow app.
Once imported hover over the Flow item and you will see an “Edit” icon appear, click that.
The below is a screen shot of the not even the entire flow, only about 90% of it because it was too big to zoom out enough. You can see that it is quite complex.
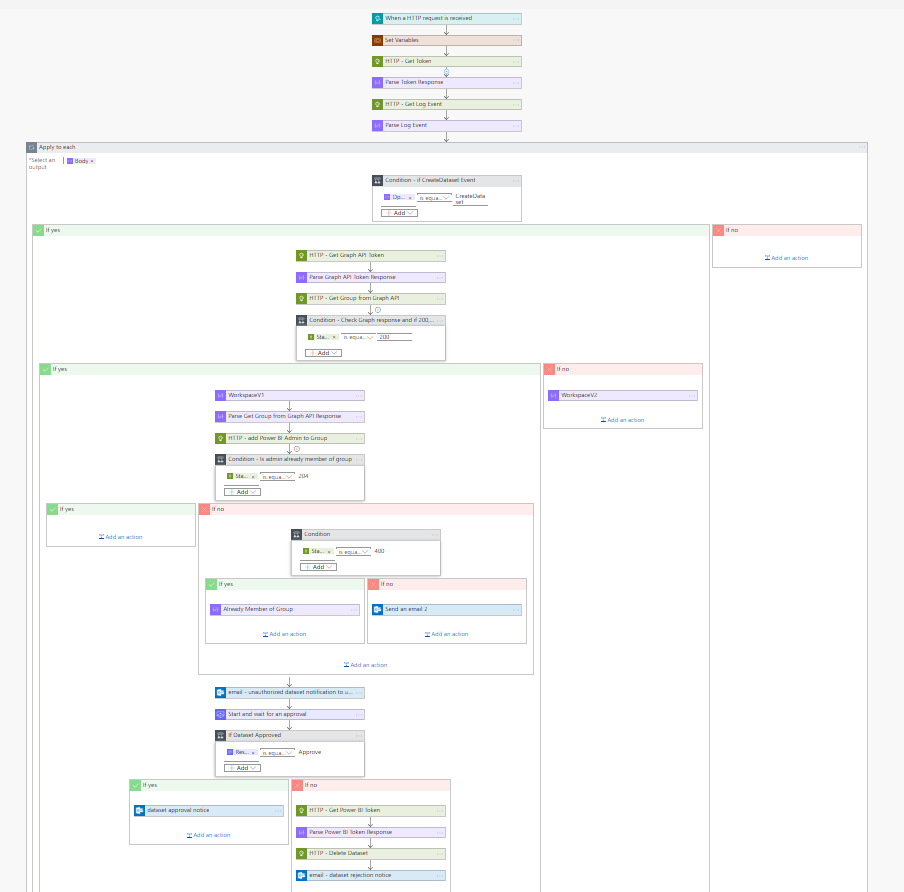
I will attempt to explain each step of this Flow below. This turned into a dissertation so if you don’t care and just want to move on to making it actionable, skip below.
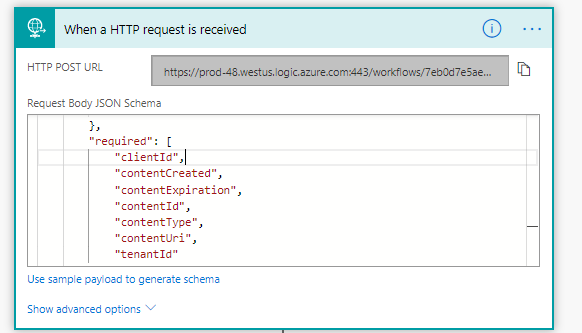
- The Flow is triggered by an O365 webhook (which we will configure later). Any time an audit event is created in O365 (which includes Power BI events) this Flow is triggered.
- Variables need to be set (some of the stuff I had you record earlier will need to be filled in here… i will explain below). These variables drive communication with the APIs we need that all use the permissions setup in Step #1.
- Call the Get Log Event API from O365 Management APIs and pass it an authorization token and the contentUri from the trigger event (this is effectively a link to lookup what happened).
- In parsing the response of the Log Event, there are going to be multiple records return. It enters a for each loop and if the “Operation equals CreateDataset” we do further inspection of the event, otherwise we do nothing.
- Note that you could modify this to look for any events listed here. The “CreateGateway” event comes to mind as a good one to notify a BI administrator on. Maybe good for the next blog post.
- For my scenario, If we do find a CreateDataset event I want to check if the Group created is a V1 or V2 workspace. This is done in two parts.
- Call the Graph API to “GET” the Group (in Power BI we call them Workspaces but in O365/Graph they are Groups).
- If the Workspace that the dataset was created in is a V2 workspace I don’t care about it as I already have governance controls there like a Contributor role and an admin setting that allows me to restrict users from creating workspaces. V2 workspaces do not show up in O365/Graph so therefore if I don’t get a status code of 200 (which means the call was successful) then I assume it is a V2 workspace and therefore i can stop processing.
Note: What i did also find out late in testing is that datasets created in “My Workspace” will also throw a non 200 status code so I am not auditing for datasets there either.
- If this is a V1 workspace, i am now going to use the Graph API to add my Power BI Admin service account to that workspace. I have to do this because if i choose to reject this dataset as an administrator, the Power BI API WILL NOT work to delete the dataset unless the user is an admin of that workspace. Adding this account also gives the option to the Power BI administrator to login with that service account and do a manual inspection before approve/reject.
- I now check for a status code of 204 which indicates I added/created the user assignment successfully. If it wasn’t successful, that could actually mean that my Power BI Admin service account was already an admin of that workspace (might be rare but could happen). If this happens it throws a 400. I am not doing further inspection on a 400 error at this time so be aware that something else could trigger that and could mess up your Flow. If 400 is thrown, i set a variable via a “Compose” element to indicate the user is already a member/admin of the group. I use this later. If I didn’t get a 204 and I didn’t get a 400 I assume some other error occured and i send an email to the Power BI admin that a flow has failures
- Now we send a polite email warning to the user who created the unauthorized dataset in a V1 workspace and let them know it will be reviewed by an admin.
- We start an approval process that sends an email to the Power BI admin email address that was set in the Variables section in Step #2 with all the important information about the dataset.
Note: For some reason the ReportName and ReportId are not working and therefore the link to the item is broken. Need to fix this. - If the admin clicks the “Approve” button on the email, an approval email is sent to the user who created the dataset, if not, proceed to step #11
- Now we have to call the Power BI API to Delete the dataset automatically. We send a rejection email to the user so they know it was deleted.
Note: I don’t believe that V1 workspaces allow for use of user principals for authorization so this is why we had to set a Power BI Admin service account id and password in step #2. It would be cleaner to not have a user identity at all and just use the app permissions. - Check the variable we set in Step #7 to see if the power bi admin service account needs to be deleted from the Group and if so we use the Graph API to do that so that there is no residual effect to that O365/Team from the Power BI admin inspection process once it is completed.

In the workflow, the only section that requires configuration is the “Set Variables” in the second action. Click on it to explode the “Scope”.
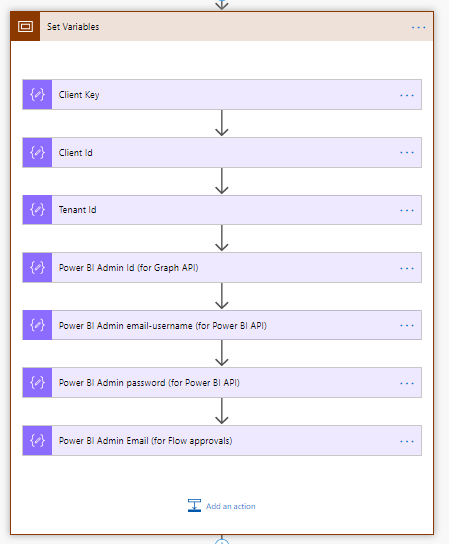
Other than the last variable for the email address to be used for the approvals, all of these are used for the API calls. They are required for authorization to do some pretty intrusive things like adding administrators to O365 groups and deleting Power BI datasets. This is why we needed an O365 global administrator to approve our app permissions earlier as this shouldn’t be taken lightly.
Let’s go through each of these and click on them to set the values:
Client Key – (aka App Secret) You recorded this in the first section. Often these will have special characters so we need to html encode it. Use https://www.url-encode-decode.com/ and encode your client key and take that value and paste it in here
Client ID – paste exactly as copied (shouldn’t contain special characters)
Tenant ID – paste exactly as copied
Power BI Admin ID (for Graph) – the Object ID for the admin service account exactly as copied
Power BI Admin email-username (for Power BI API) – the email address of the admin service account discussed in the first section
Power BI Admin Password (for Power BI API) – this is the password of the service account discussed in the first section
Power BI Admin Email (for Flow Approvals) – This is an email address of a REAL PERSON who is checking emails on this account. Someone who can make the desicion to approve/reject datasets. Can it be a distribution list or security group? I don’t know for sure, try it out 🙂
Once you have updated these variables, you have completed the configuration of your Flow (or logic app). The last thing you need to do is go to the first activity in your Flow (the trigger) and copy the HTTP POST URL. This is the “webhook” you need for Step #3.
At the top of the page, click “Save”.
That’s it. Step #2 complete.
Create the Webhook
This is by far the easiest shortest step of the 3… however it can be intimidating if you aren’t familiar with REST APIs and tools like Postman. This is where a developer friend can make very short work out of this task.
Every time an event happens in Power BI, we want our Flow to be called to inspect it. We can do this by setting up a webhook. A webhook is simply an automated endpoint that gets called every time something occurs.
One thing to note about Power BI events: It could take as long as 30 minutes after the event occurs for the event to show up in the audit logs. The webhook fires immediately after that, but when you go to test this, realize that it is pretty consistently 20-30 minutes before your Flow will get executed.
In the source code that i provided i included a Postman collection that can be used to do testing on a lot of the API calls that are used in the Flow. These are provided for troubleshooting purposes.
Import the collection from the my GitHub repository. You can either download it and import or simply “Import from Link”.
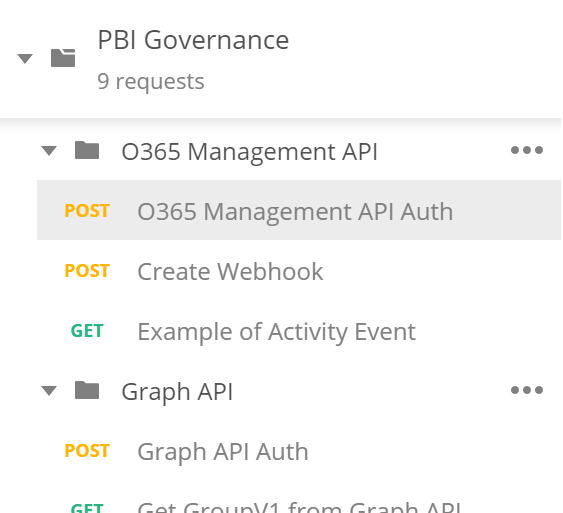
In that collection is an O365 Management API folder that has an “Auth” and then a “Create Webhook” API that need to be executed to hook up your Flow with the URL we recorded at the end of Step #2.
Run the “Auth” first. When you go to run it you will notice that i have used variables for the url and the body (x-www-form-urlencoded).
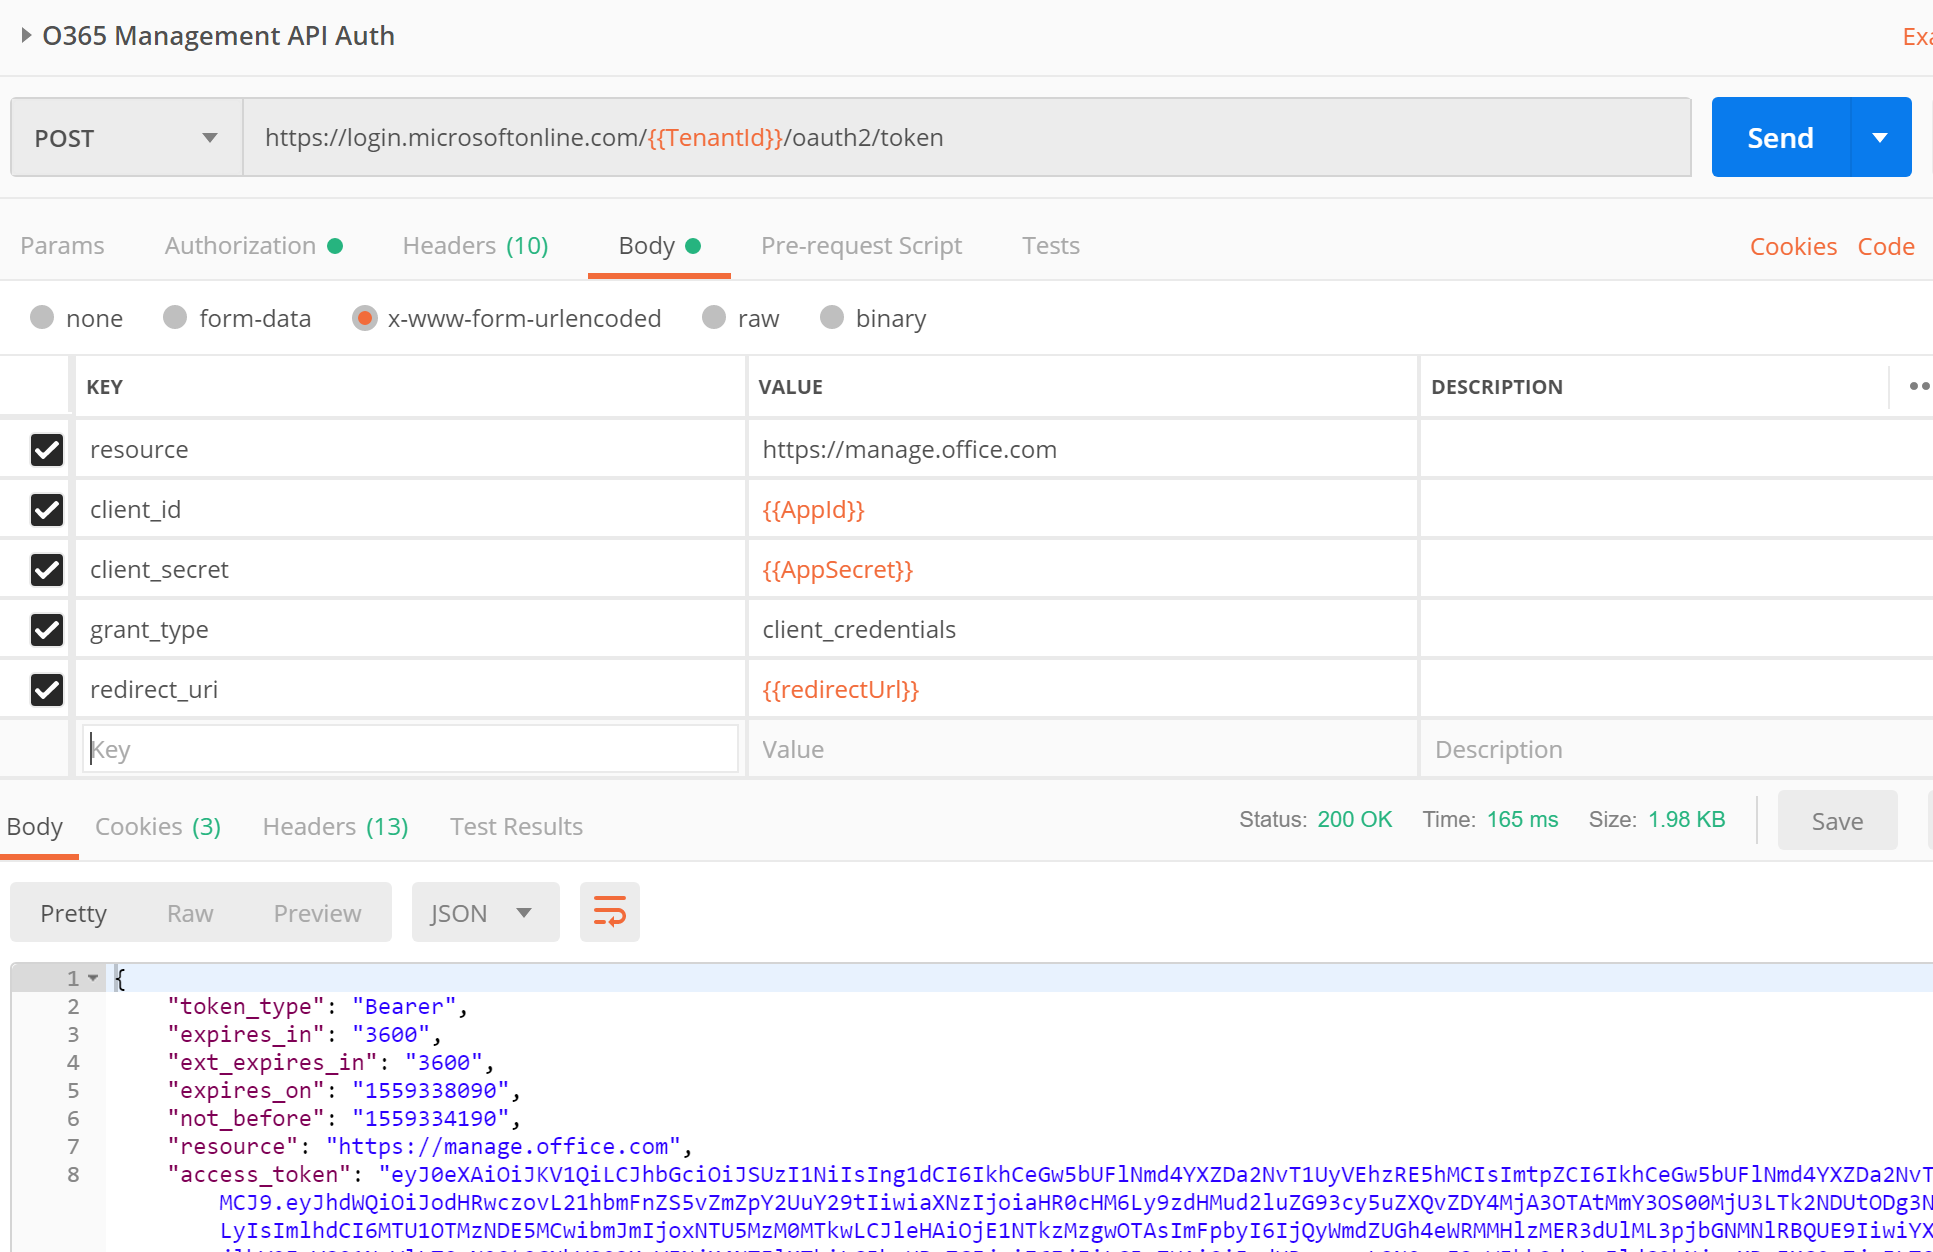
Create an environment with these variables or simply replace these values with those recorded in Step #1. For the redirectUri just use http://localhost or the custom value you used when setting up your app registration in step #1.
Send the request (should be a POST) and copy the value returned in the “access_token”. This value is how you authorize subsequent calls to the O365 Management API. It is good for one hour and holds information about the permissions your app has (those api permissions you setup in step #1).
Now open the “Create Webhook” request. In the “Authorization” tab replace the “Token” value with the access_token you just recorded. In the “Body” replace the {{flowurl}} variable with the Flow trigger url you recorded at the end of Step #2. Replace the {{activityfeedauthid}} with some arbitrary name. Of course i used “angrygovernance”

If you got a success then your webhook should be created and you are now ready to test.
Step #3 complete!
Testing
Upload a Power BI report to a V1 workspace in Power BI. Go to the Flow you imported and Saved. After about 30 minutes you should see a Flow that is running (it has manual approval steps to be taken so it will run for months until approved/rejected.
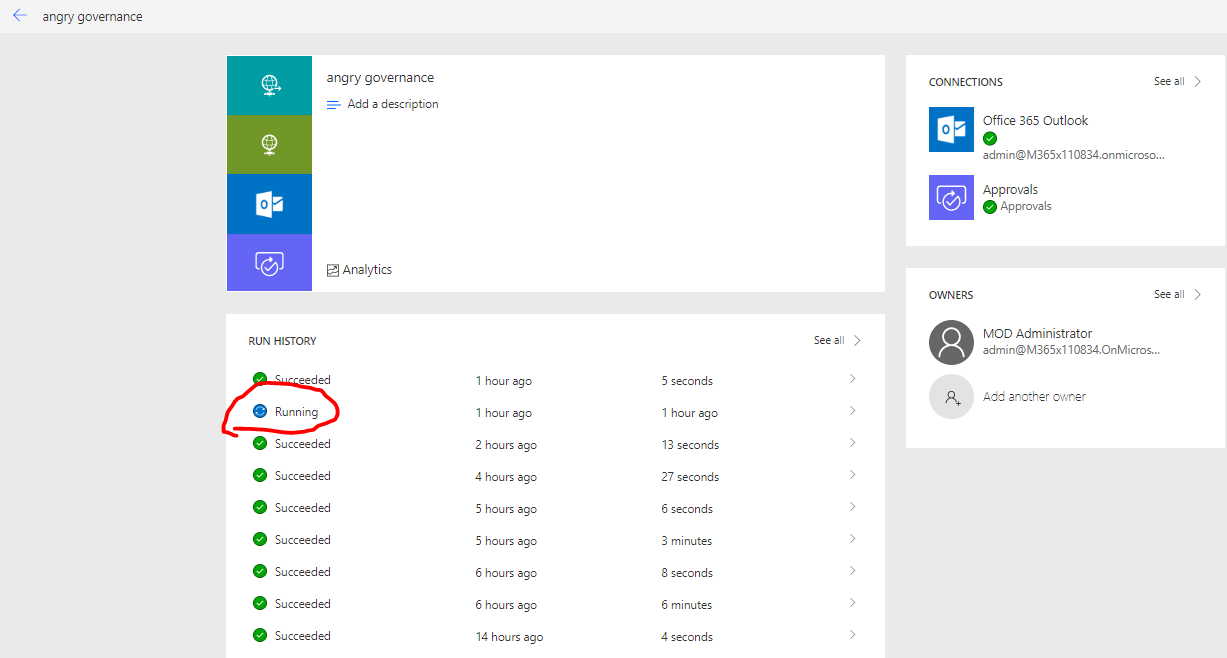
you will see other “succeeded” runs of your flow that are not important. These are other events occuring in O365 such as you saving your Flow… We have a condition looking for only “PowerBI-CreateDataset” events before we are kicking off approval process.
You should see emails generated to the administrator email id you specified and also back to the user that created the dataset. If you reject the dataset, it should automatically get deleted (along with the report) and the Power BI Admin user should get removed from the V1 workspace if it was not already a member of it before the Flow started.
Conclusion
I know that your scenarios may vary from mine that i have provided above, but with this Flow to use as a basis, you should be able to do some adjustments and create really kick ass governance Flows that give you more control in Power BI than you ever had before.
